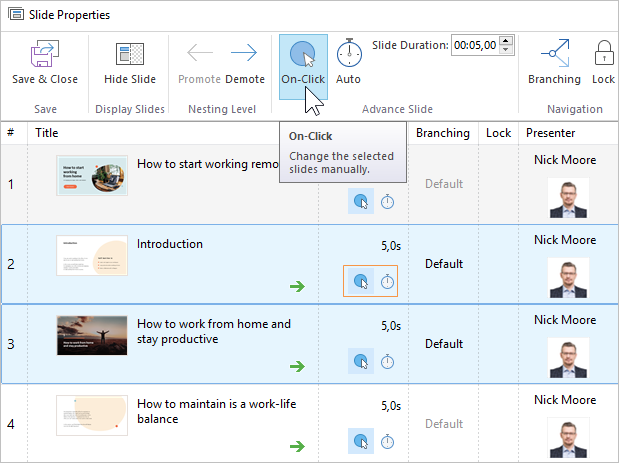
You can set a slide to advance to the next one automatically after a specified period of time and/or on a mouse click.
Click the Slide Properties button on the iSpring Converter Pro 10 toolbar.

Select one or more slides whose advance settings you would like to change. To select multiple slides at once, hold CTRL or SHIFT when clicking on desired slides.
Select On-Click or Auto on the toolbar to change advance settings for one or more slides.
The second way to configure the advance to the next slide is to select the On-Click or Auto next to a slide. This method will work if you selected only one slide.
To make the slide advance automatically, select On-Click. If you want the slides to be changed in a specified amount of time, choose Auto.

- Finally, click Save and Close on the toolbar.

Note:
If you select both On-Click and Auto, the advance to the next slide will happen automatically, but learners will also be able to switch to a new slide by clicking on it.
If you don't select any of these options, users will proceed to the next slide by using links on the slide, navigation buttons on the player, or keyboard controls.