Inserting Web Objects
You can insert the following types of Web Objects to your presentation:

Web Address
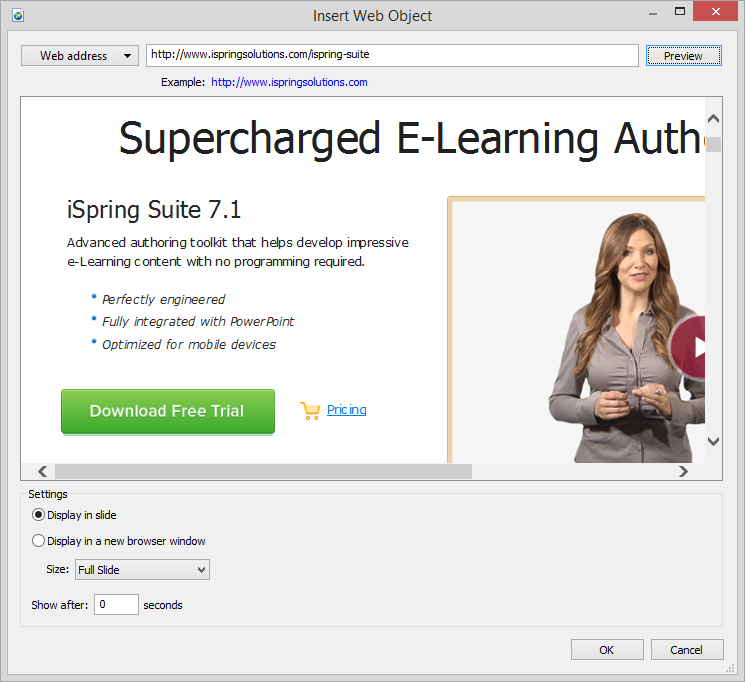
To insert a Web address, do the following:
- On the iSpring Suite toolbar, click the Web Object button.
- Select Web address in the drop-down list in the upper-left corner.
- Type in the address of the web page you want to insert or paste the URL from the address line of your browser.
- Click the Preview button to check if the entered address is correct.
- Select the way your Web Object will be displayed.
- Display in a slide. Choose this option to put your Web Object on a slide of your presentation. You can customize the size of the Web Object by selecting it from the drop-down menu or by pulling the edge of the Web Object directly on the slide. You can also customize the position of the Web Object.
- Display in a new browser window. You can choose to display your Web Object in a new browser window. It’s possible to specify the required size of a browser window, or open it to the full screen.
- Specify when your Web Object will appear. The default delay is 0 seconds, which means that a Web Object appears immediately. You can change the delay time according to your requirements.
- Selecting Turn off automatic slide transition for this slide option will prevent presentation from advancing to the next slide automatically.
- Click OK to insert the Web Object into your slide.
Local File
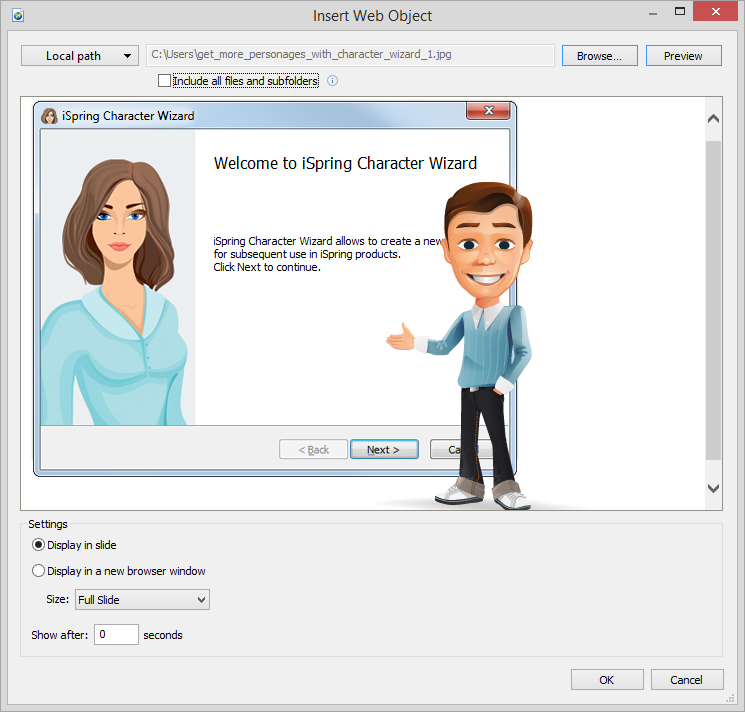
To insert a local file, do the following:
- Click the Web Object button on the iSpring Suite toolbar.
- Select Local path in the drop-down list in the upper-left corner.
- click Browse... to navigate to the file you want to insert.
- You can check if the entered path is correct by clicking the Preview button.
- Select the Include all files and subfolders checkbox if all the files and subfolder located in the same folder with the selected file should be added to the presentation.
- Click OK to insert the Web Object into your slide.
Embed Code
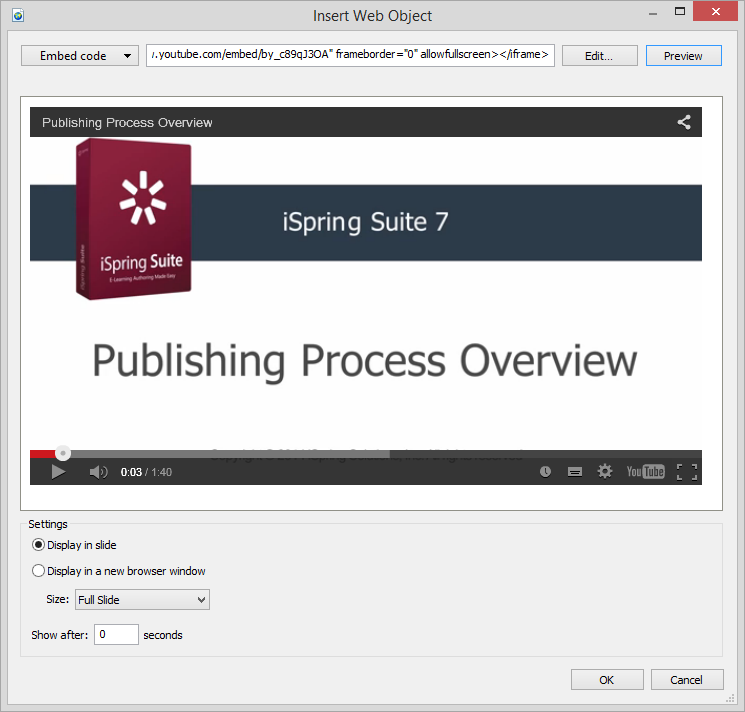
To insert an embed code, do the following:
- Click the Web Object button on the iSpring Suite toolbar.
- Select Embed Code in the drop-down list in the upper-left corner.
- Click the Edit button and type in the code you’d like to insert or just paste it from clipboard.
- Click the Preview button to check if the code you’ve pasted is correct.
- Click OK to insert the Web Object into your slide.
Display on a Slide
If you select the Display in slide option, a placeholder will appear, indicating that a Web Object is inserted into the slide. The placeholder can be easily moved or resized. After the conversion to Flash and HTML5, the selected Web Object will be displayed instead of the placeholder.

If you select the Display in a new browser window option, an icon of the Web Object will be displayed on a slide, indicating that a Web Object is inserted. The icon can be put anywhere within a slide. After the conversion to Flash and HTML5, the icon won’t be displayed and your Web Object will be opened in a pop-up window.
