How to Embed your HTML5 Presentation in a Website
There are lots of ways to share your PowerPoint presentation. For example, you can send it by email, assign it to users via iSpring Learn LMS, or upload it to the iSpring Cloud service.
iSpring Suite can convert your presentation to a web-friendly HTML5 format. All PowerPoint functionality like animations, transitions, video, and audio, will be maintained, and the slides will look perfect both on desktops and mobile devices, including iPhones and iPads.
Also, iSpring Suite has lots of extra options that can help you put together exciting content for your website or blog. For instance, tell your readers how your company has developed from its beginnings to its current state with the Timeline interaction. On the pricing page, show your goods with the Media Catalog interactive module. A powerful and illustrious story will stir up emotions and stick in your users' minds.
Let's see how to upload a presentation converted or created with iSpring Suite to your website or blog.
Publishing and Uploading a Presentation to a Server
- Open a PowerPoint presentation that you would like to embed in your website or blog. Next, select the iSpring Suite 9 tab on the toolbar and click the Publish button.

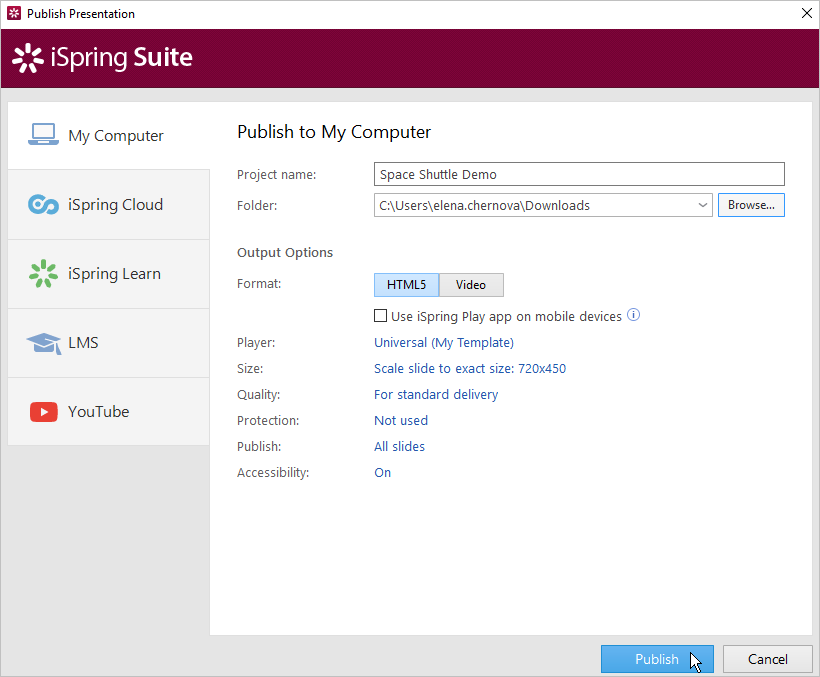
- Choose the My Computer tab, enter the presentation's name, and configure its settings. Finally, click Publish.

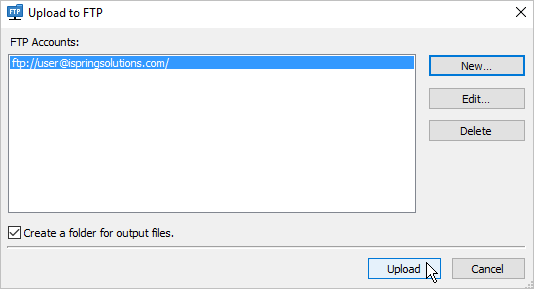
After the publishing process is over, upload the presentation, which is now available in the HTML5 format, to the server. To do this, click FTP.
What is FTP and how it worksFTP is a file transfer protocol that allows you to upload files to a server.
To obtain your FTP account login info, contact your hosting provider. They will supply you with the following data: the host name, the user name, and the password.
To log in to the server, download an FTP client - a program that provides access to a server. One of the most popular FTP clients is FileZilla.
- In the opened window, enter the FTP login info that you have received from your hosting provider, click OK, and the presentation will be uploaded to your server. Learn more about uploading content created with iSpring Suite to FTP in this Previewing and Sharing Presentations article.

- Next, get the link (URL) for the uploaded presentation.
If you have uploaded your presentation to the site root (as a rule, it is the public_html folder), the link will have the following format: your_site_name/presentation_name. For example, ispringsolutions.com/mypresentation.html.
Let's say you decided to upload the presentation to a particular folder, and not to the root. In this case, the folder name will be added to the link address: your_site_name/folder_name/presentation_name. For instance, ispringsolutions.com/courses/mypresentation.html.
Inserting your HTML5 presentation into a website
You can opt for one of these two ways to insert your PowerPoint presentation into a website so it will play online:
Play your HTML5 Presentation on a Separate Webpage
One of the easiest ways to share your presentation via a website is to provide a hyperlink to the presentation somewhere on a web page. To insert a hyperlink, switch to the HTML editing mode and use the following code:
<a title="CUSTOM TITLE OF THE LINK" href=”ENTER YOUR URL” target=”_blank”> CUSTOM TEXT OF THE HYPERLINK</a> You can choose to open the presentation in a new browser tab (target=”_blank”) or in the same tab (target=“_self”).
Play your HTML5 Presentation as a Pop-up
To have your presentation open in a pop-up window, make sure your website allows the use of JavaScript code.
You can use the following code to create an on click pop-up:
<script>  function popup(url)
{
     window.open(url, 'new', 'width=800,height=600,scrollbars=no,menubar=no,status=no,toolbar=no');
}
</script>
<a onClick="popup('http:// ENTER YOUR URL ')">CUSTOM TEXT OF THE HYPERLINK</a> You can customize the width and height and add different elements to your pop-up (learn more here).
Or, you can set the pop-up window to appear as soon as the webpage is loaded:
<script>  function popup(url)
{
     window.open(url, 'new', 'width=800,height=600,scrollbars=no,menubar=no,status=no,toolbar=no');
}
popup('http://ENTER YOUR URL');
</script>Insert your HTML5 presentation into an HTML iFrame Tag
If you want to show your HTML5 presentation within your webpage, you can insert it into an iFrame using the following HTML code:
<iframe src="http://ENTER YOUR URL" width="800" height="600" scrolling=”no” />If published on your website in one of the ways described above, your HTML5 presentation can be delivered to much wider audiences using modern web browsers, mobile devices, and iPads. Learn more about HTML iFrames.